
We already had a pretty awesome backyard. Shortly after moving in back in 2019, I assembled two swingsets we had picked up off of neighbouhood groups into one super-long play structure, and added a sandbox under one of them. Kids came over of all ages and everyone had a swing they could enjoy. This was a godsend when the pandemic hit, not only did we have our own private playground when the city roped them all off. As things opened back up, people were thrilled to come hang out in our backyard — a major help to re-socialize our toddler to the world, and our newborn to see other humans for the first time in his life.
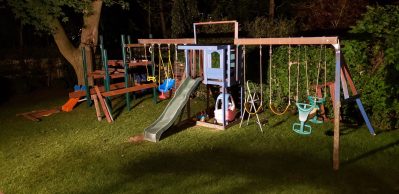
Fast forward to the summer of 2022, and the wear and tear was really showing on the play structure. Several pieces were rotten, and as the kids got bigger and heavier, so did the volume of the creaking noises the frame made from the swings. Watching the whole structure sway back and forth was as mesmerizing as it was terrifying. We decided it was time to build the treehouse that our massive maple tree had always been begging for. I drew up several designs, deliberated with my wife over how big it could be (I, as usual wanted to err on the side of overkill) and got to work planning.
Getting Down to The Roots
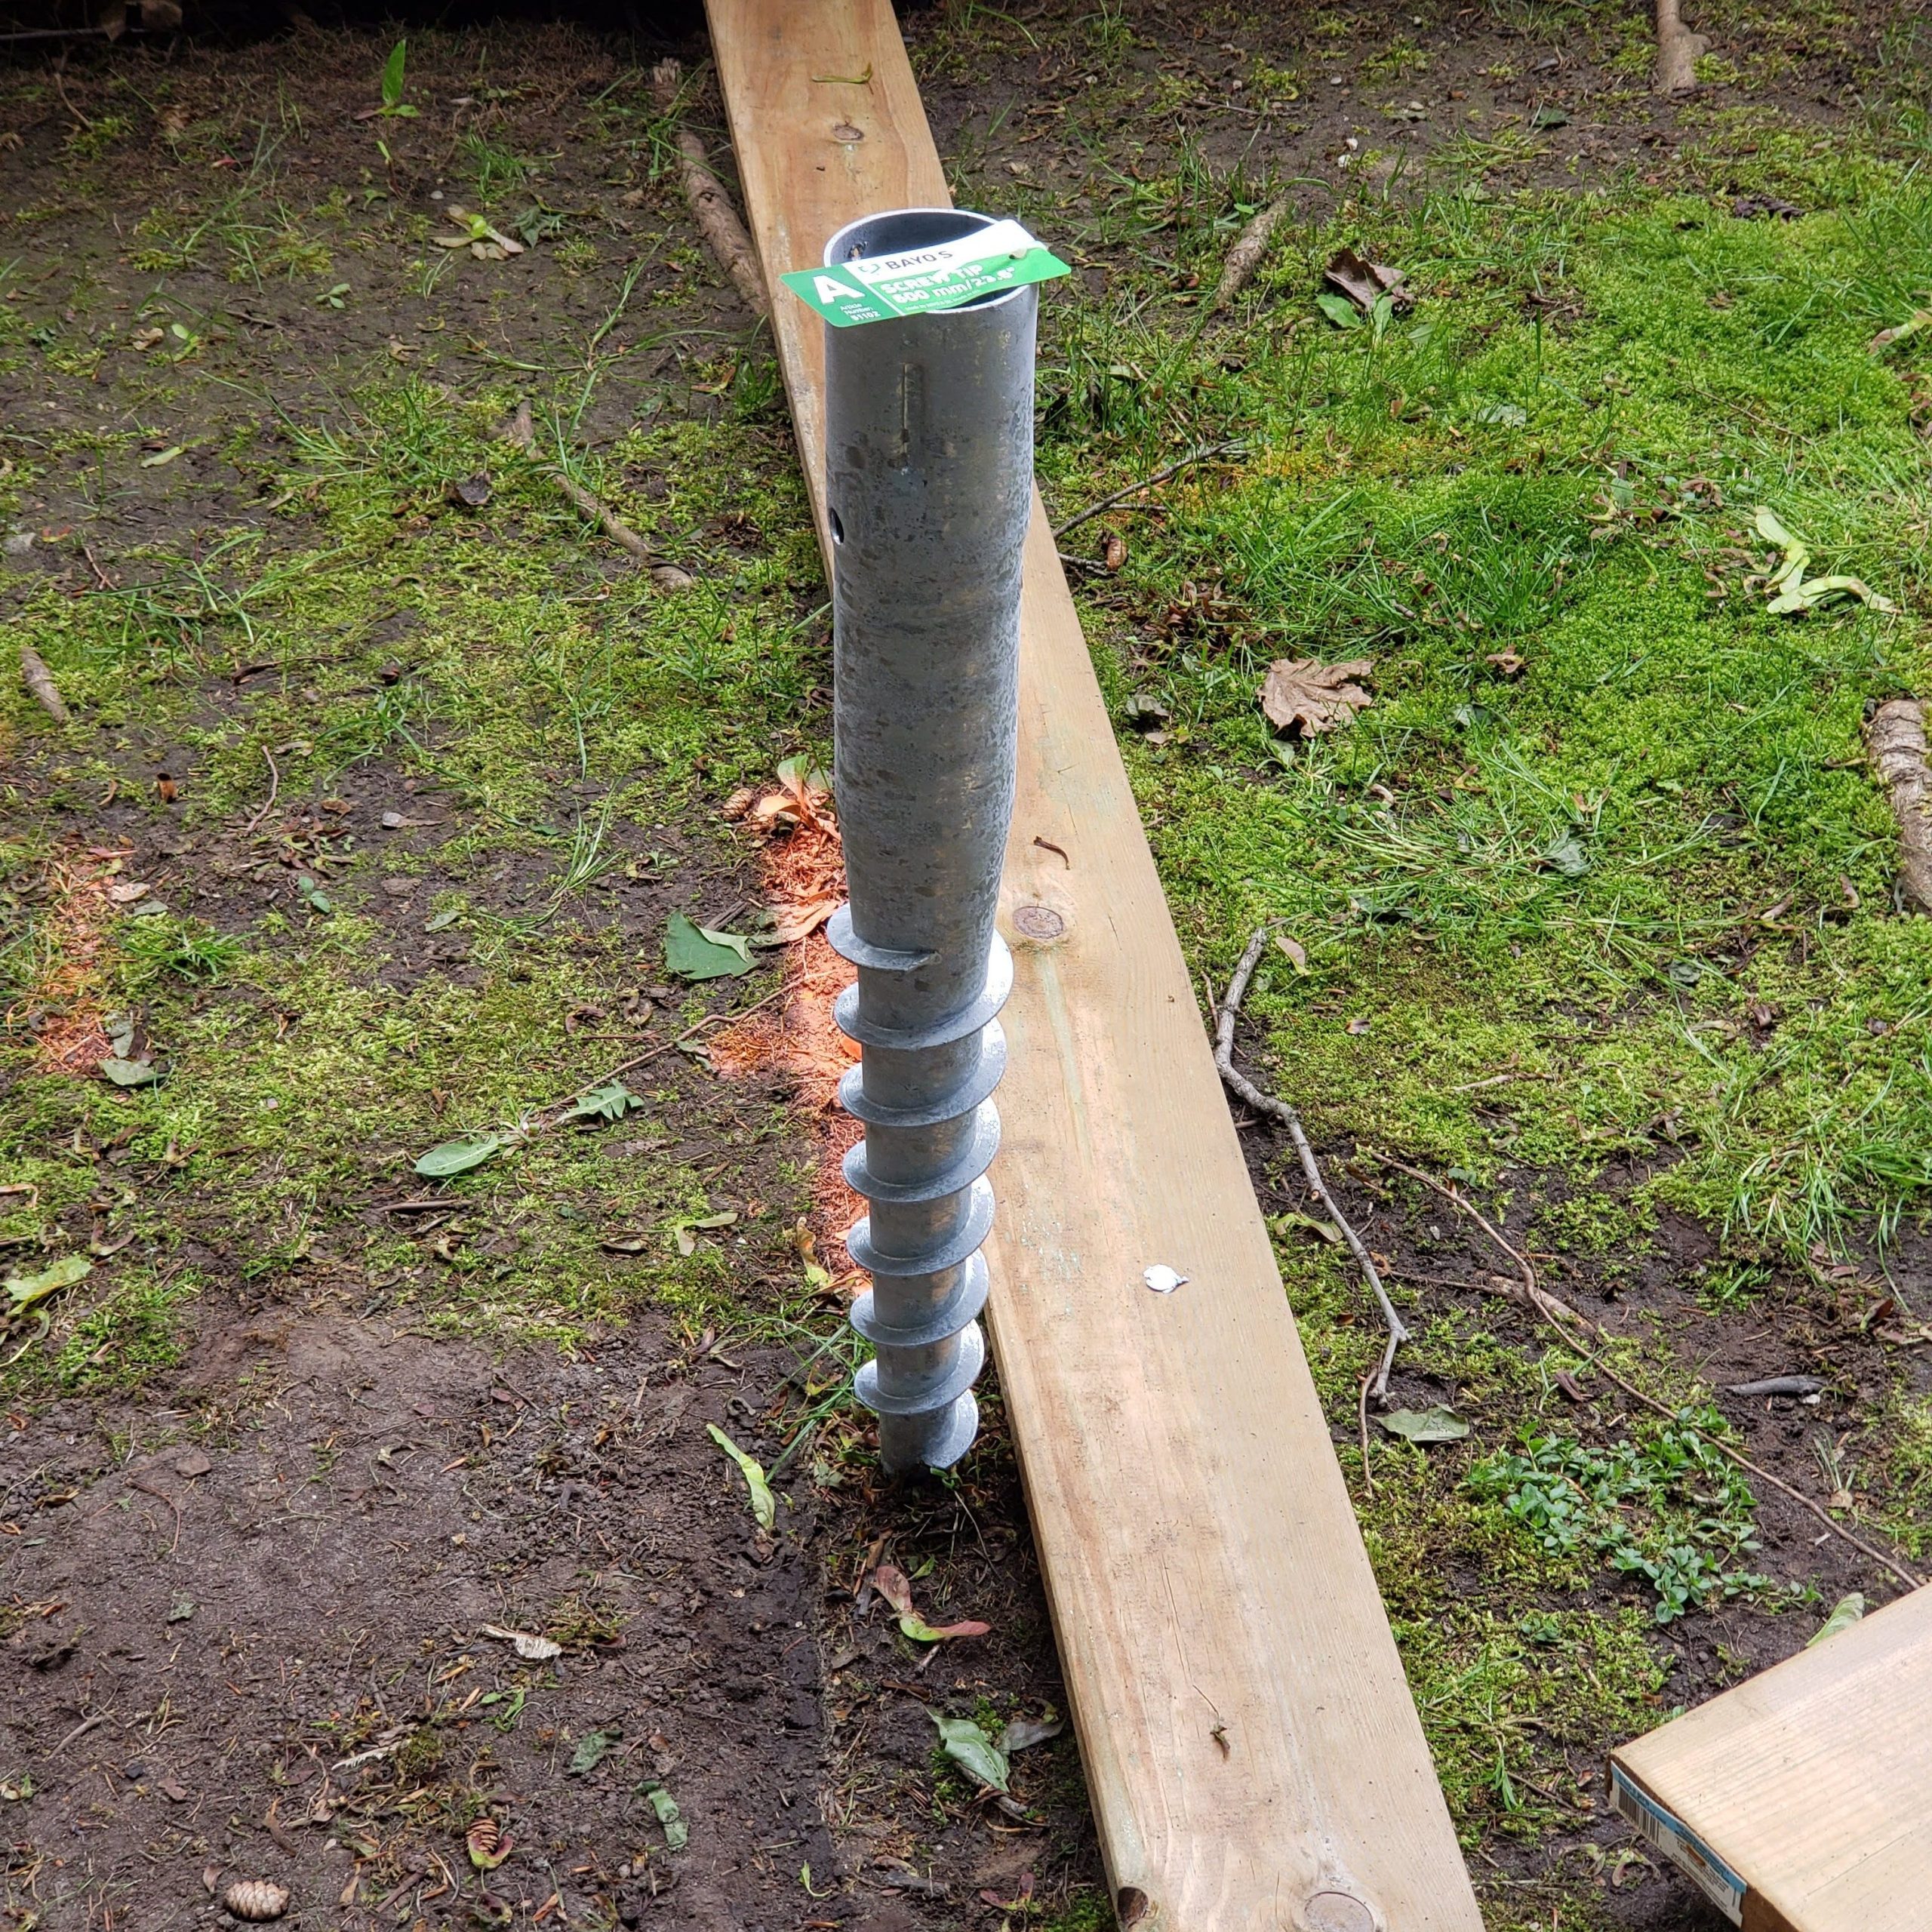
My main goal was to not harm the tree in any way, it covers about half the backyard and provides incredible shade in the summer. The fall colours were one of the things that made us fall in love with the house when we first saw it, and we can sit under it on a mildly rainy day and stay dry. This, of course also posed a huge problem, as a huge tree has huge roots. I stumbled upon a product called ground screws, which are meant to be used in close proximity to trees without causing irreperable damage. Picture a massive 3″ wide screw that can slice its way between roots instead of having to dig out a 10″ wide hole for a sonotube and chop out all roots in the way.
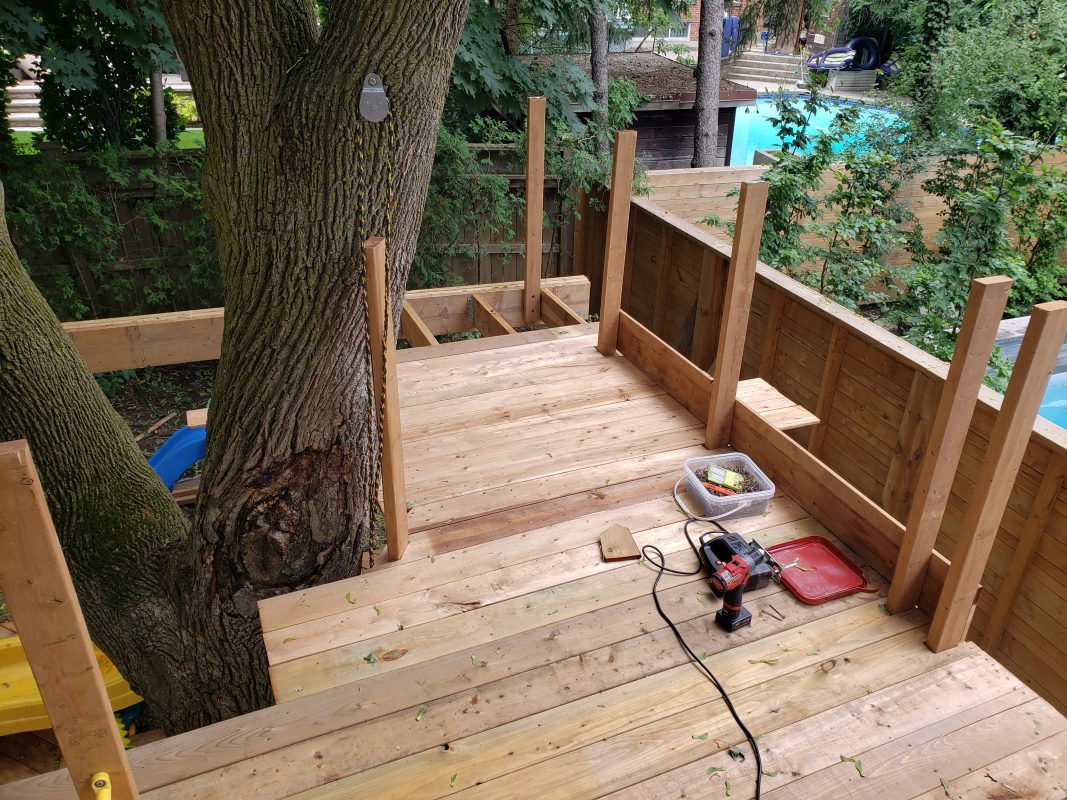
I was convinced by the vendor that I could put these things in by hand, and his installers with the massive power tools were booked up all summer, so I really had no choice. It took me a month and a half to get enough screws in the ground to support a structure — breaking two installation tools, burning out several rental power tools, and having to go twice as far away from the tree as planned. Once they were in, things started to move fast.
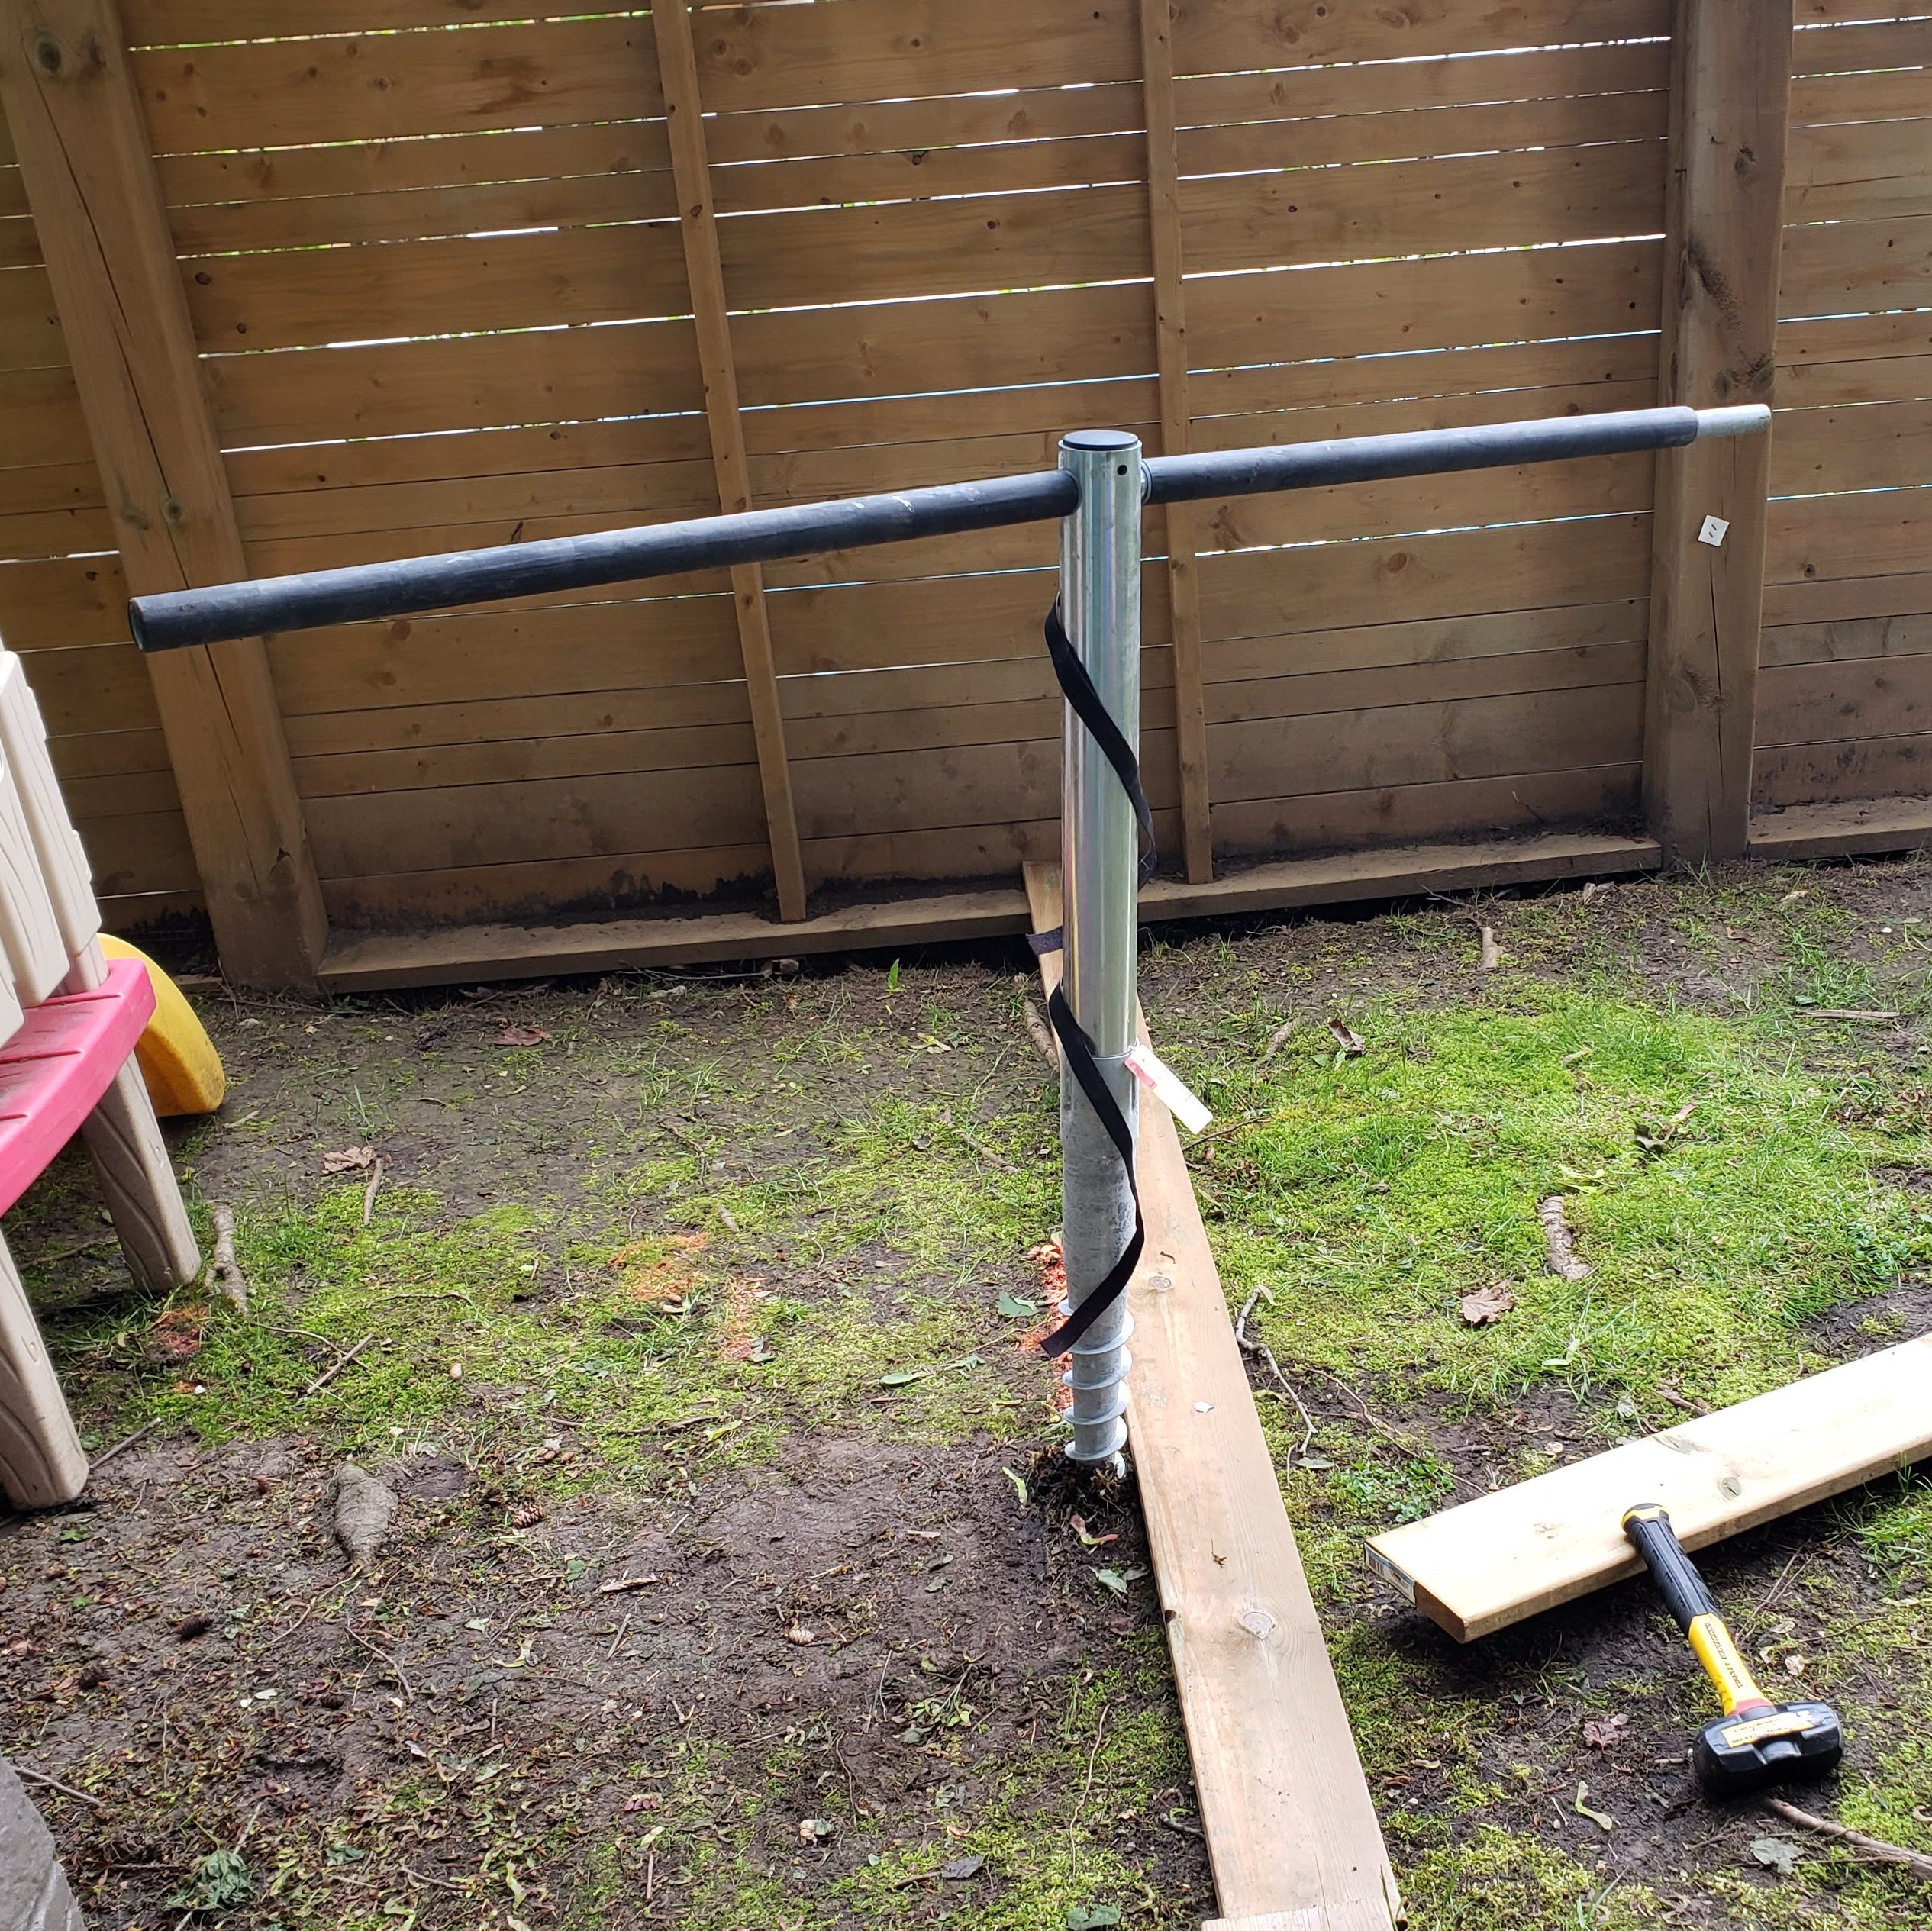

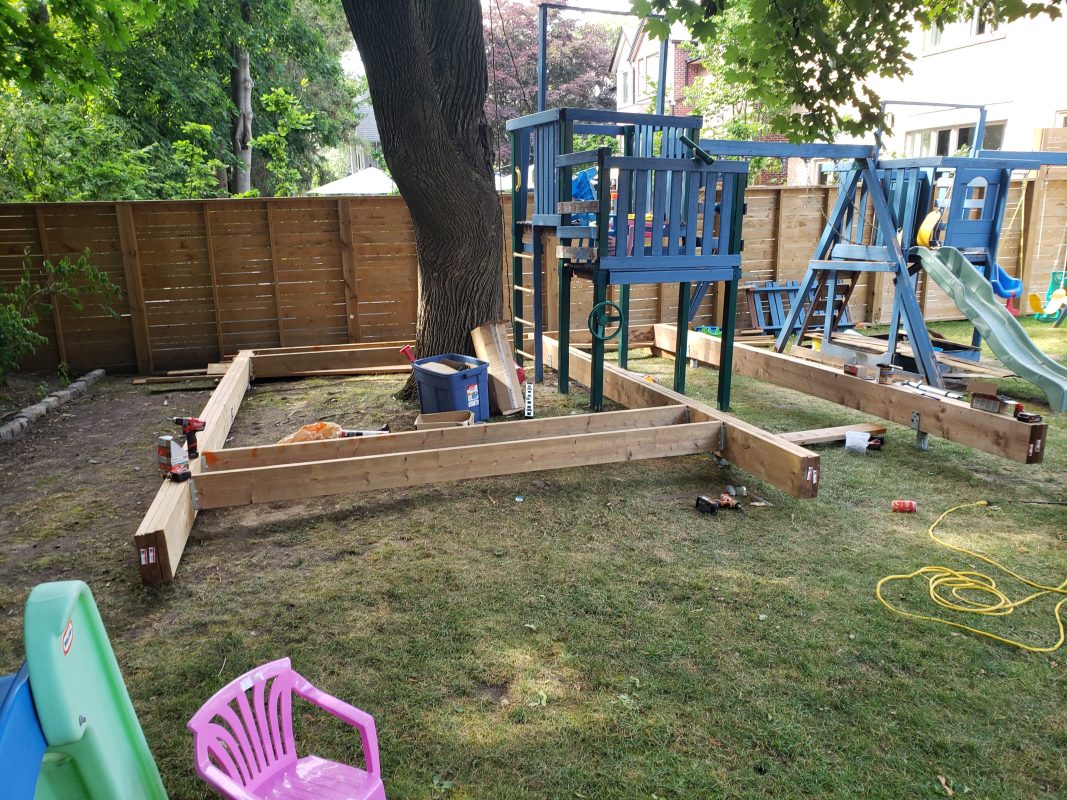
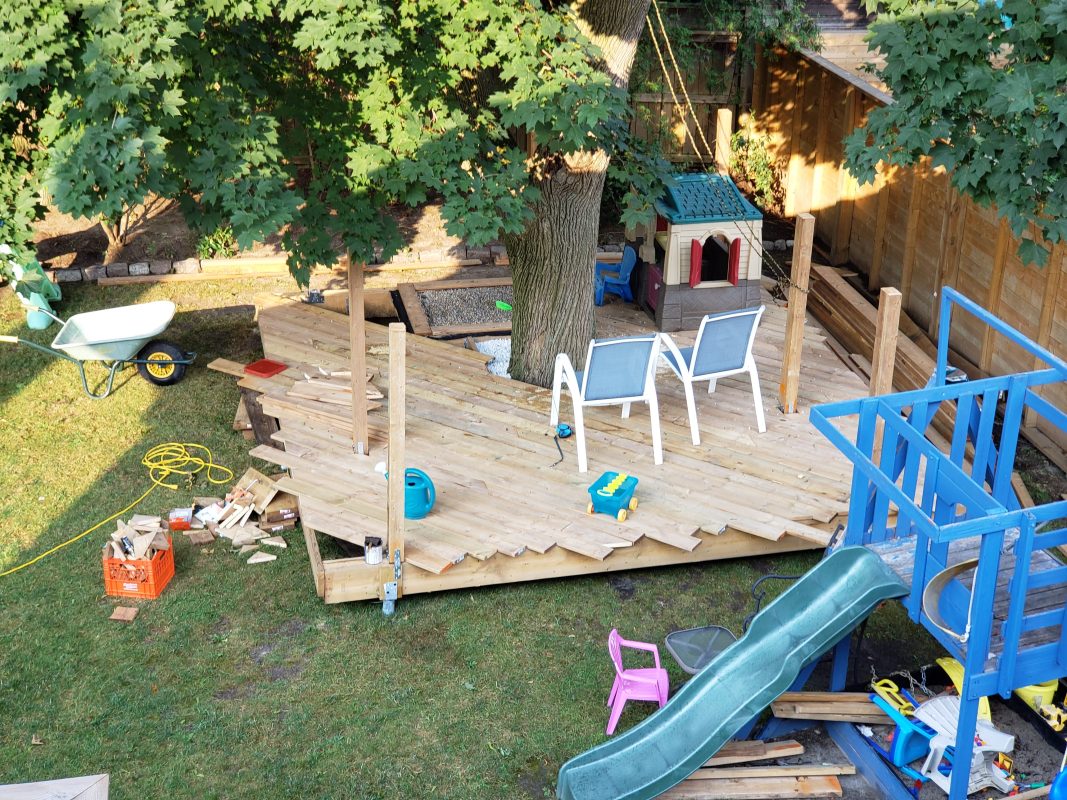
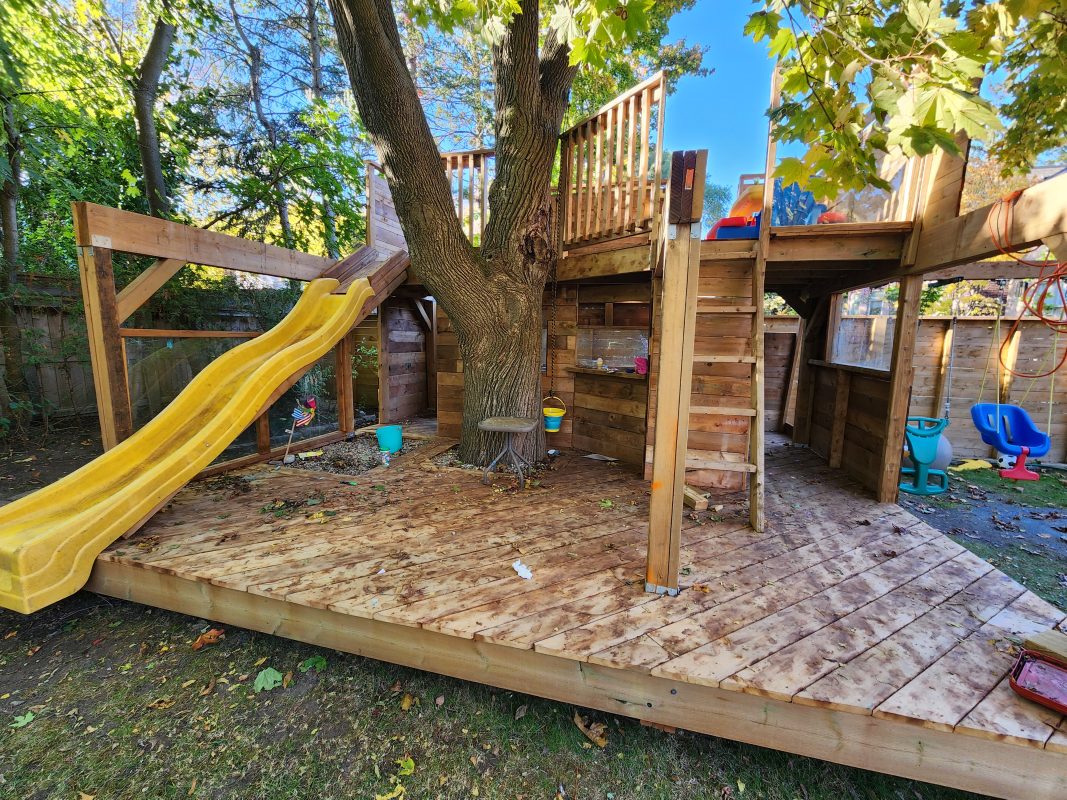
And if that wasn’t clear, twice the distance from the tree means a treehouse footprint twice the size. The final product looks nothing like any of my drawings, I pretty much had to throw everything out the window and wing it from that point on. The deck was transformational to our backyard, turning a muddy area into the perfect place to sit and have a coffee on a hot sunny day. In some ways, I wish I had just stopped there, as I was several months away from truly being done and the kids already loved it.
Reality Setting In
I’ve honestly lost track of how many people have said ‘I wish you were my dad when I was a kid!’. Yes, this is about the point where I accepted the hard truth that all of the love I was putting into this wouldn’t be appreciated for about 20 years, or when they go to have their own kids and realize just HOW MUCH WORK building this thing was. My kids will just enjoy the treehouse as they grow up, probably do a ton of ‘firsts’ in there that they’ll never tell us about, and just take for granted that they have this wicked structure in their yard that makes having fun and making friends so easy.

At every stage, I’d take my 4 year old out there to see the progress and explore the new sections I had completed that were open for business. Usually this was either met with excitement for about 5 minutes, or a loud sigh of ‘I already SAW this, daddy’ and then not much else. The exception to this were the swings going back up, and the kitchen sink getting running water. No that’s not a typo, I said this was an epic treehouse, didn’t I?

Adding the ‘Epic’ to Epic Treehouse
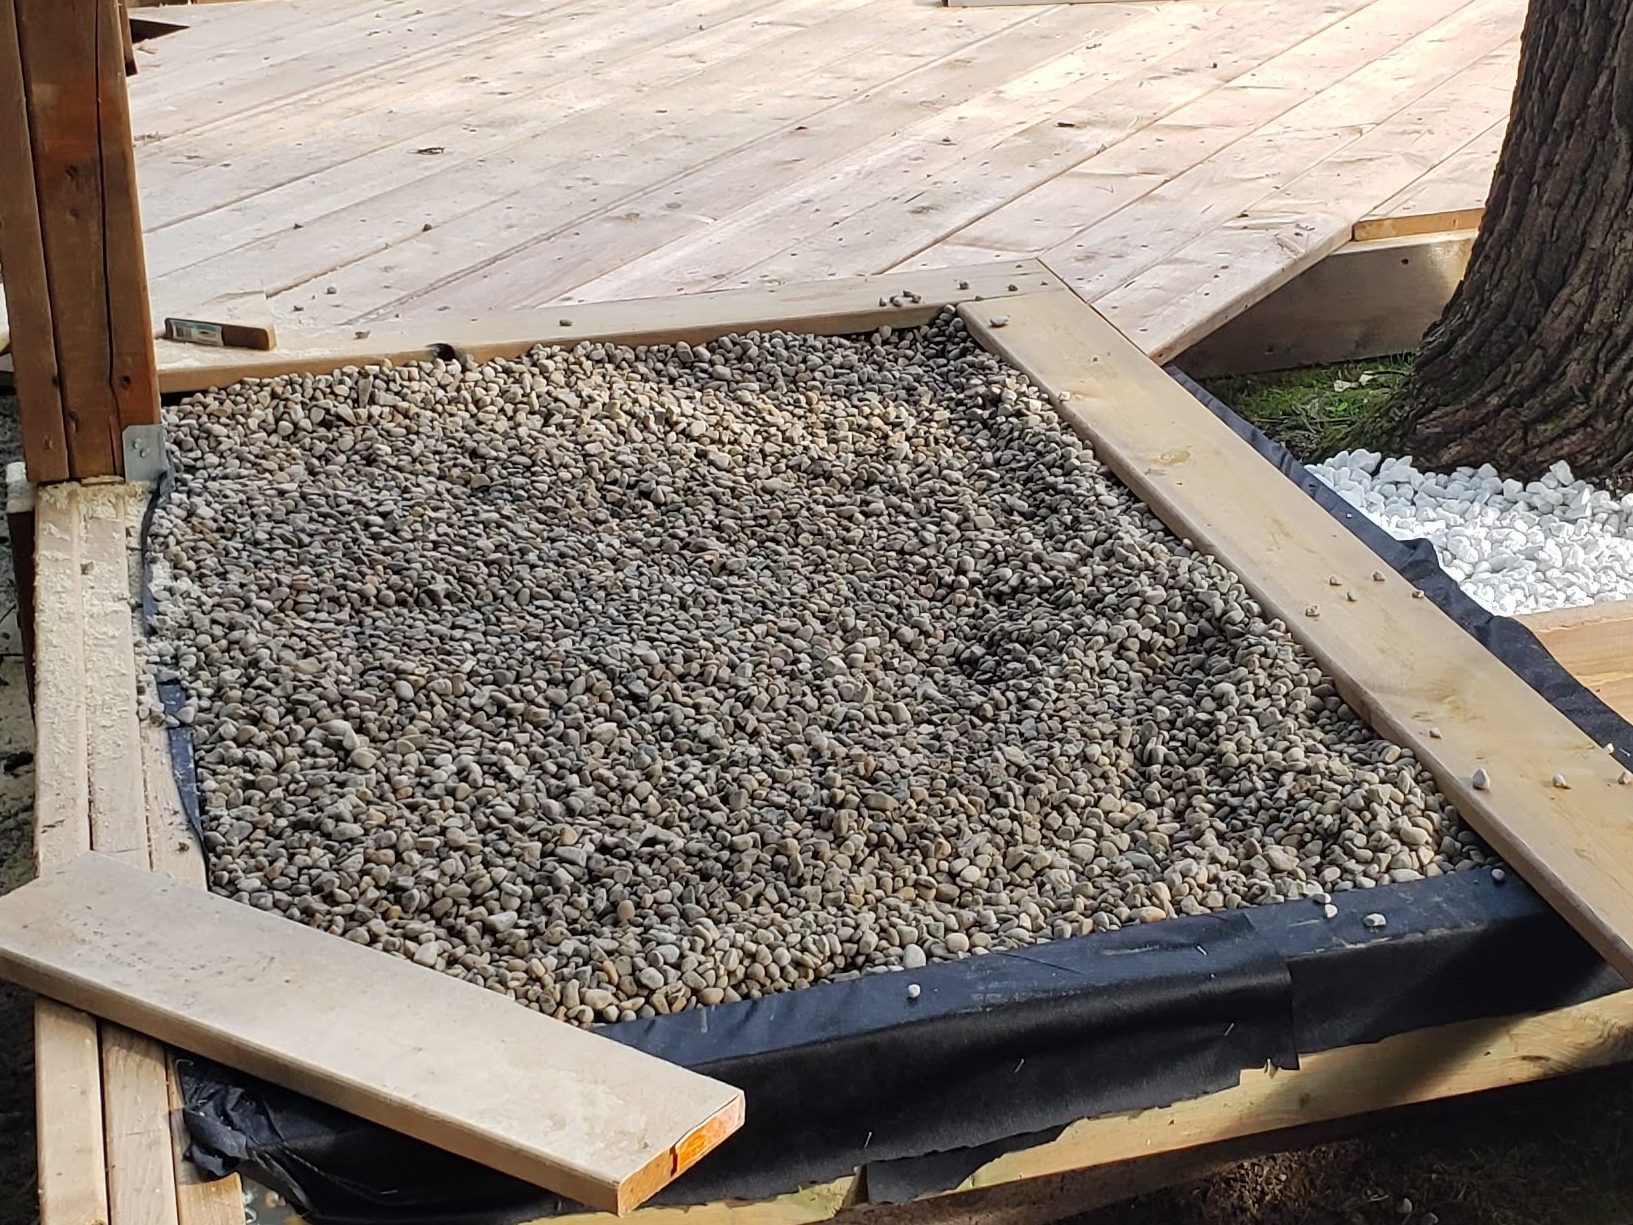
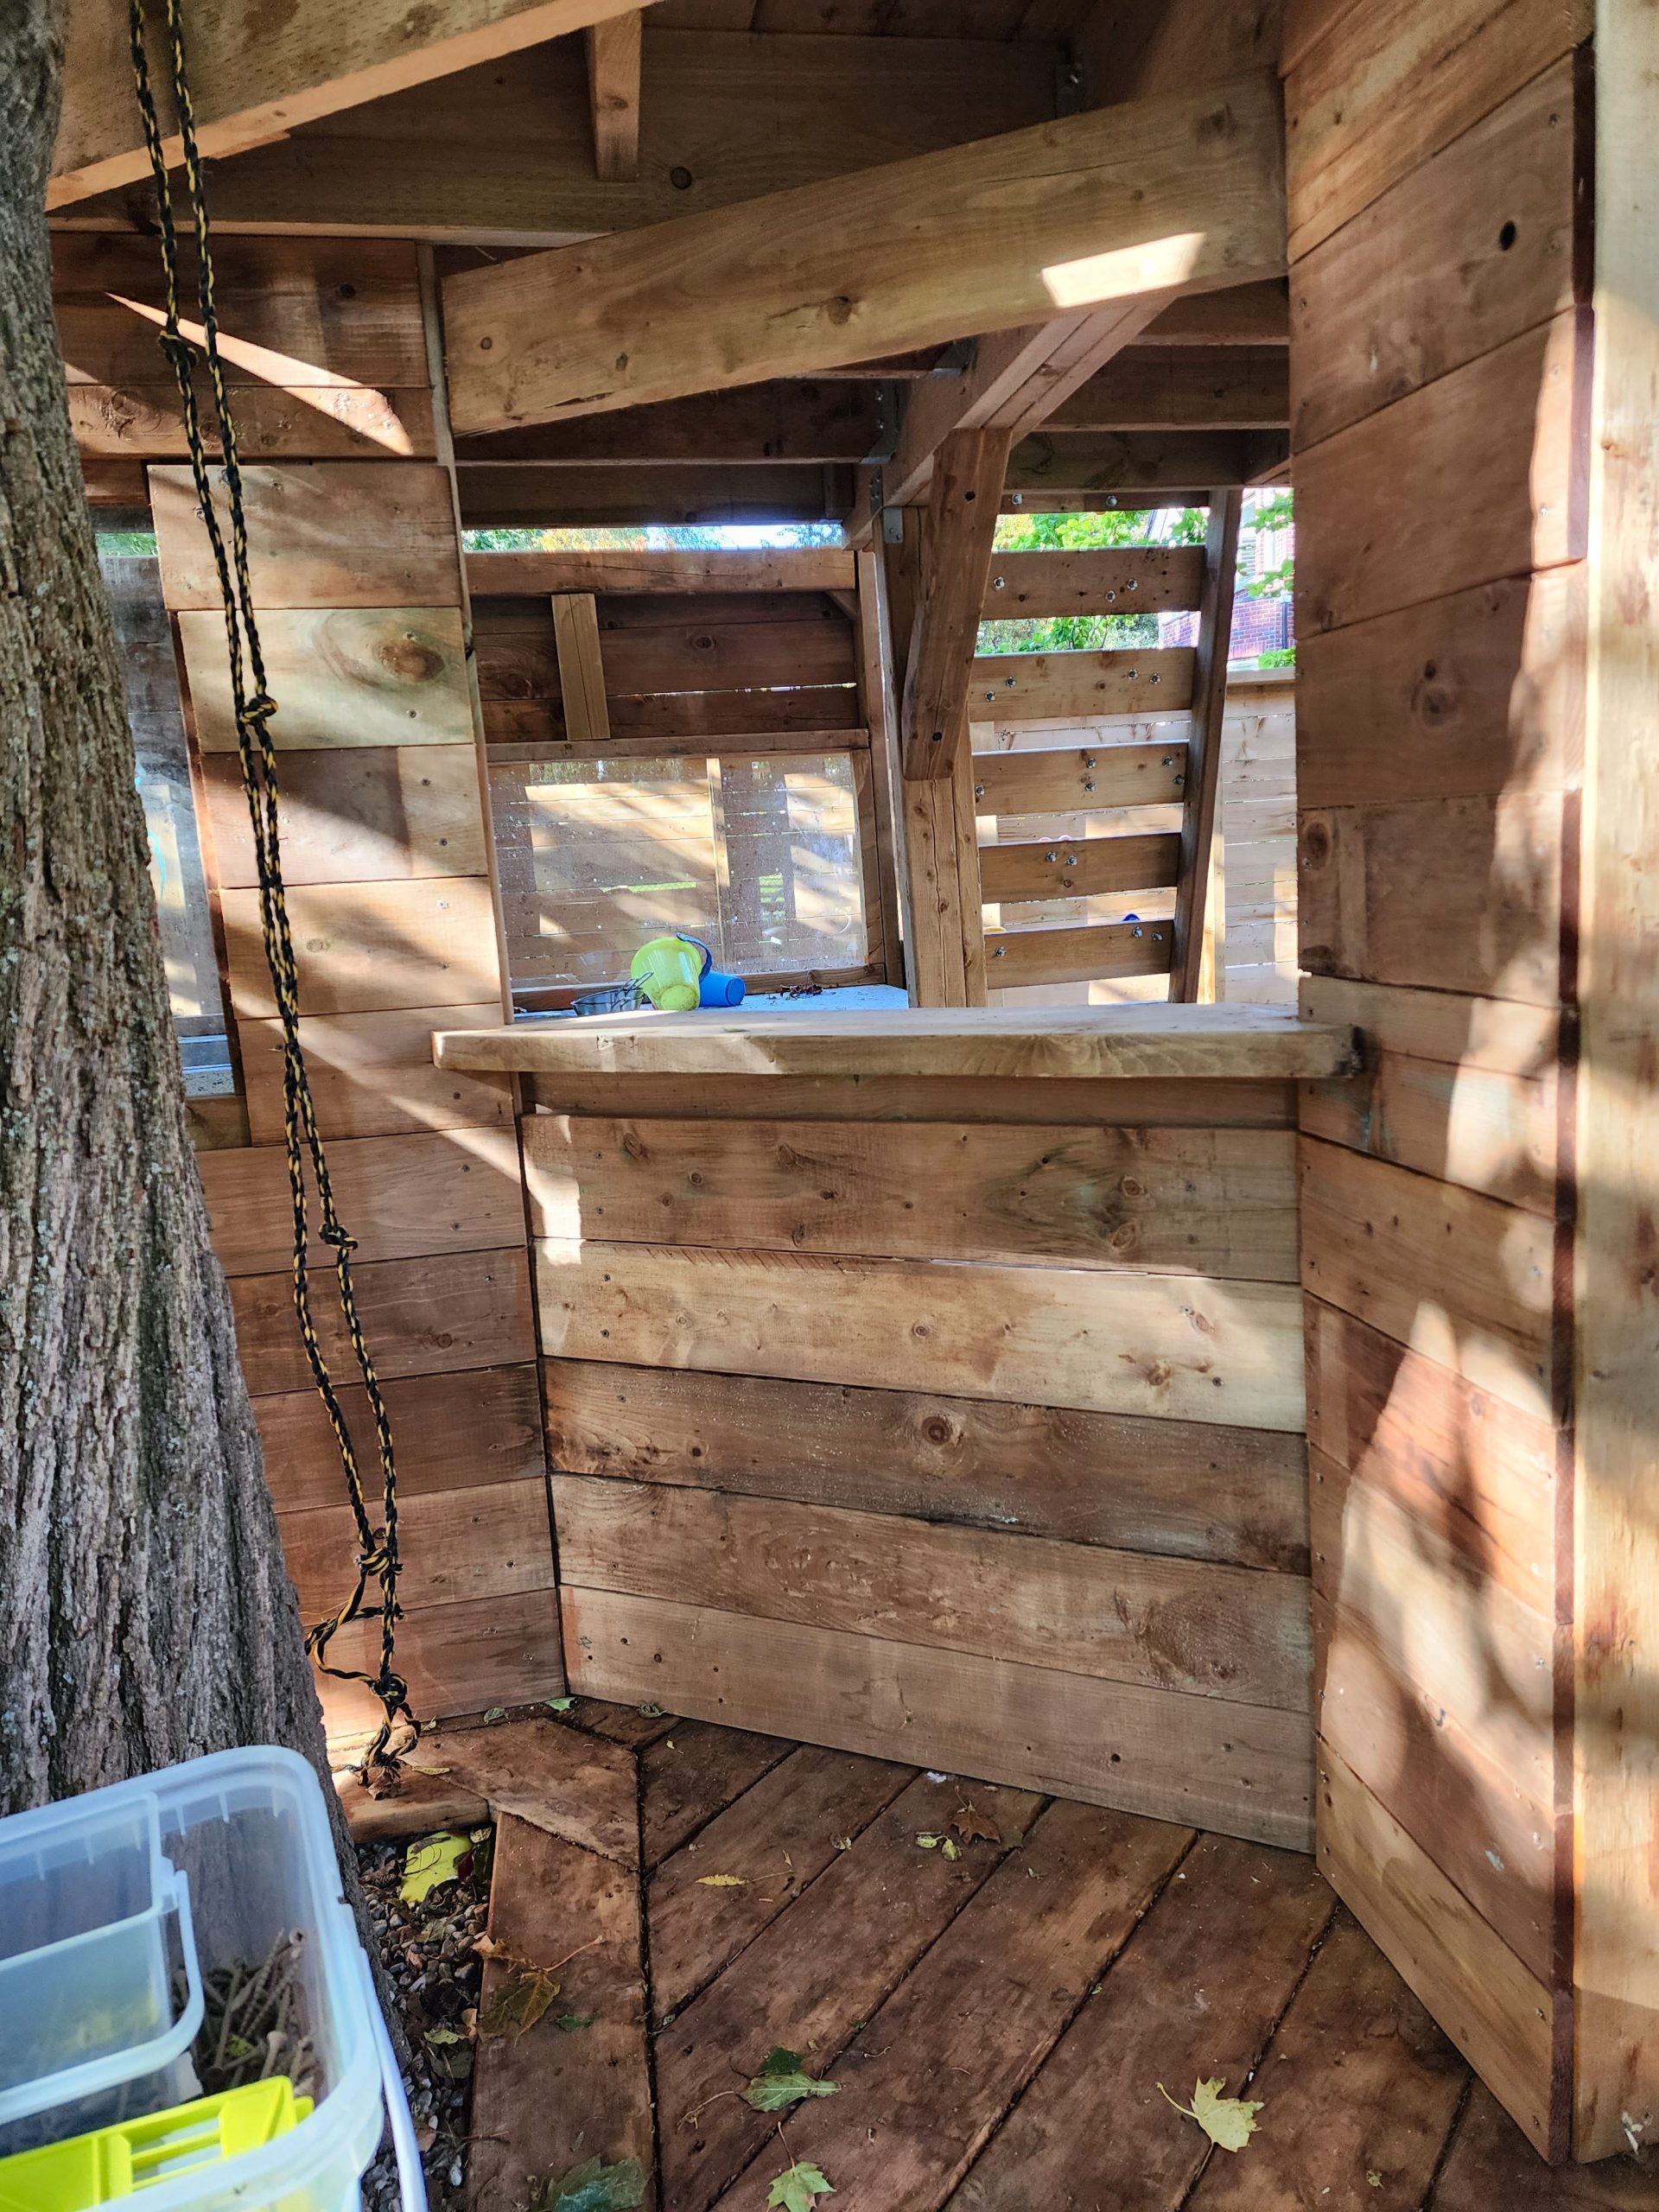
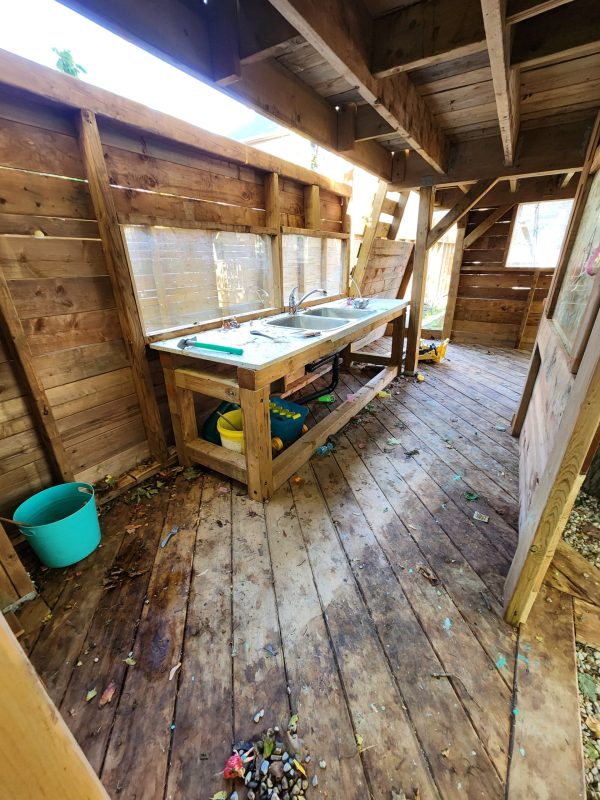
First off, we hated having a sandbox in the old structure. The kids got sand all over their clothes, it was always slushy in the spring/fall when they wanted to play in it the most and it was a pain to keep clean. I also learned that they’re horrible for transmitting and breeding bacteria and diseases. A few weeks before starting the treehouse, we met a family who had built a rock kitchen in their backyard for the kids, and couldn’t peel our daughter away from it. Instead of sand, their box was full of pea gravel and there was a kitchen sink complete with pots and pans, plastic dishes, etc… Who doesn’t love a freshly rinsed rock salad with a side of rock soup? So, sunken into the deck of our treehouse is a huge rock box, and inside the house there’s a double sink hooked up to the garden hose. The water drains under the deck to help feed the tree since we’ve deprived it of some ground water runoff.
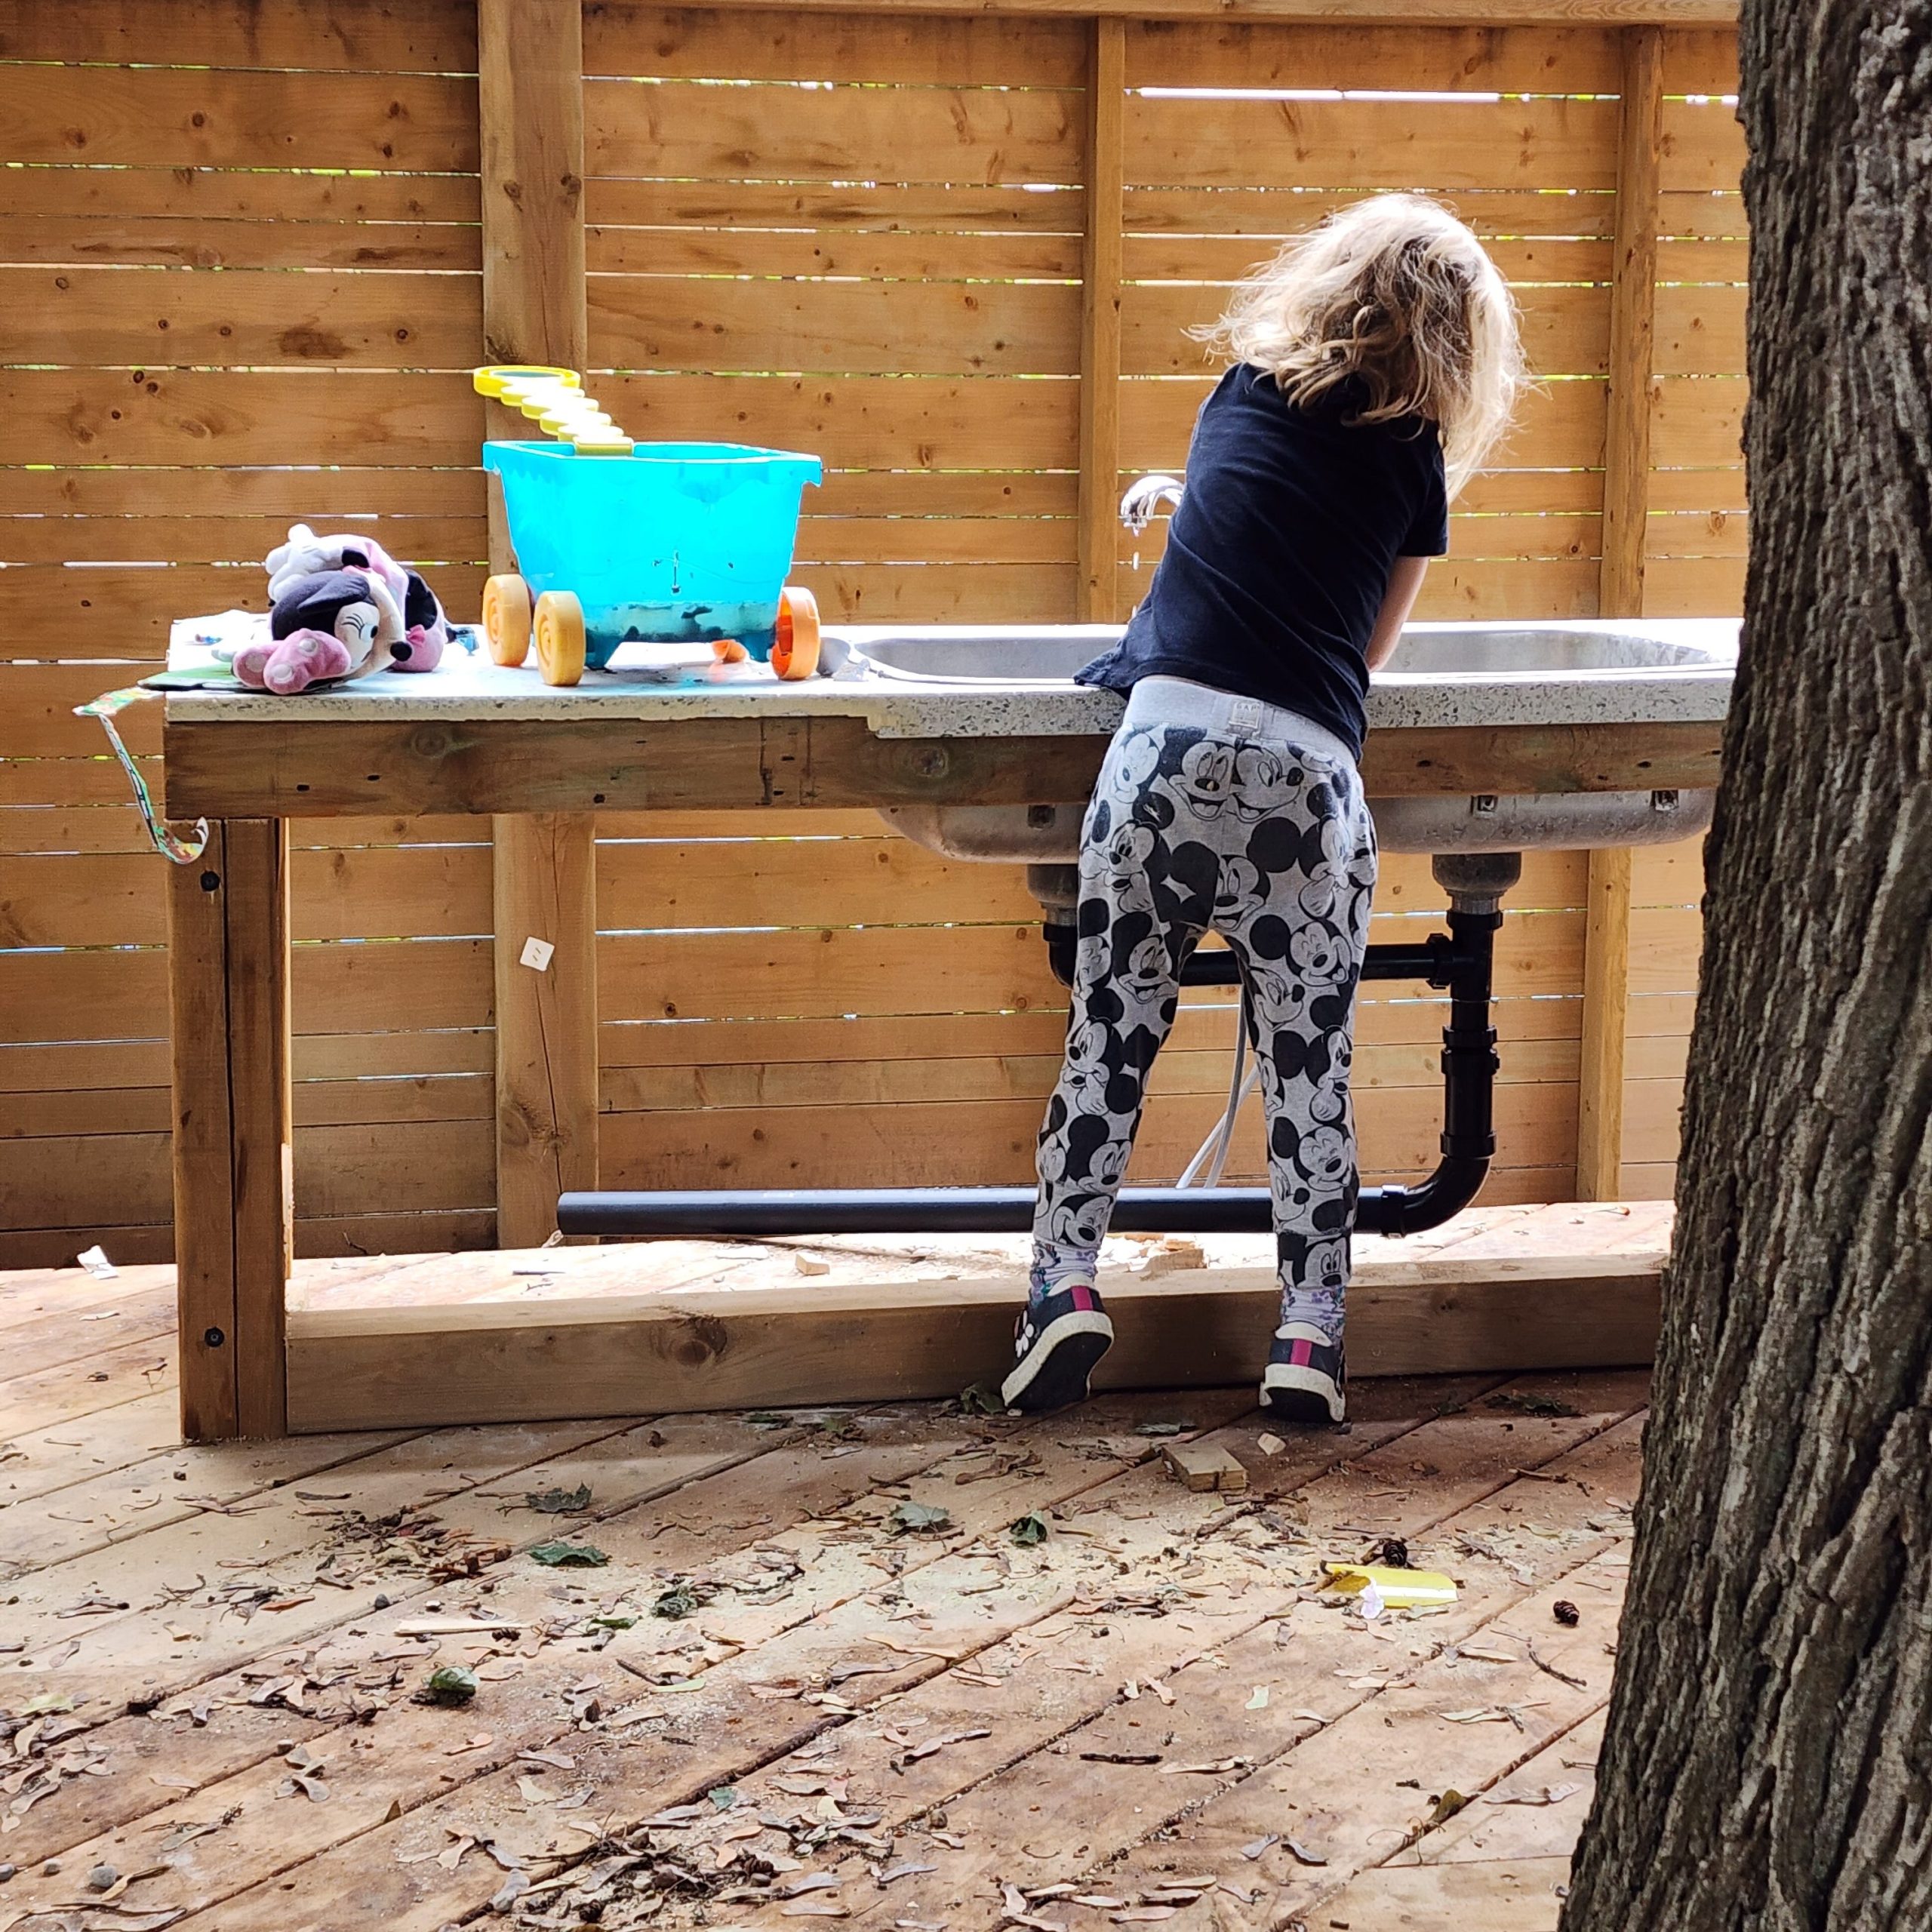
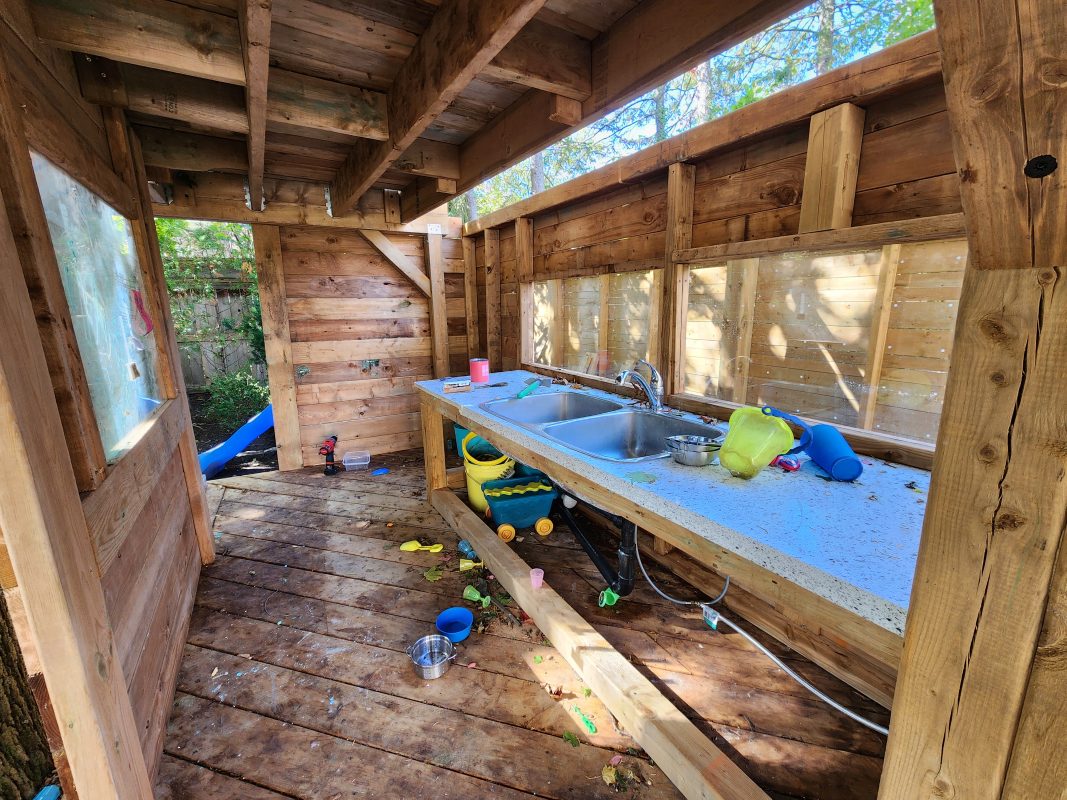
Granite countertops were a cost-saving bonus here, for a whopping $75 it was cheaper to buy someone’s old kitchen counter than to put in anything new that would be able to withstand being outside all year round. The $30 sink was something my daughter excitedly selected from our local Habitat Restore, and the only time I was able to convince her to come with me to go get supplies during this entire project.
The slide was an unexpected problem, I originally planned to stick the two slides from our old swingset one after another until I realized that they were still too short. I did some math and figured out that a 10 foot slide should do the trick, and searched high and low to find a used one online, since new ones were several hundred dollars. After getting one for free, I excitedly put it into place and realized it was still WAY too steep and I had let my engineering degree down by doing the math wrong. Re-running the numbers told me 12 feet was the right answer, and after searching high and low, I decided a custom-build was in order. You can see in the pictures what I did; next summer I’ll heat mould a sheet of plastic over it, but the wood actually works great as-is. This is now an adult-grade slide, it’s fast, it’s tall, and is surprisingly a ton of fun for all ages.
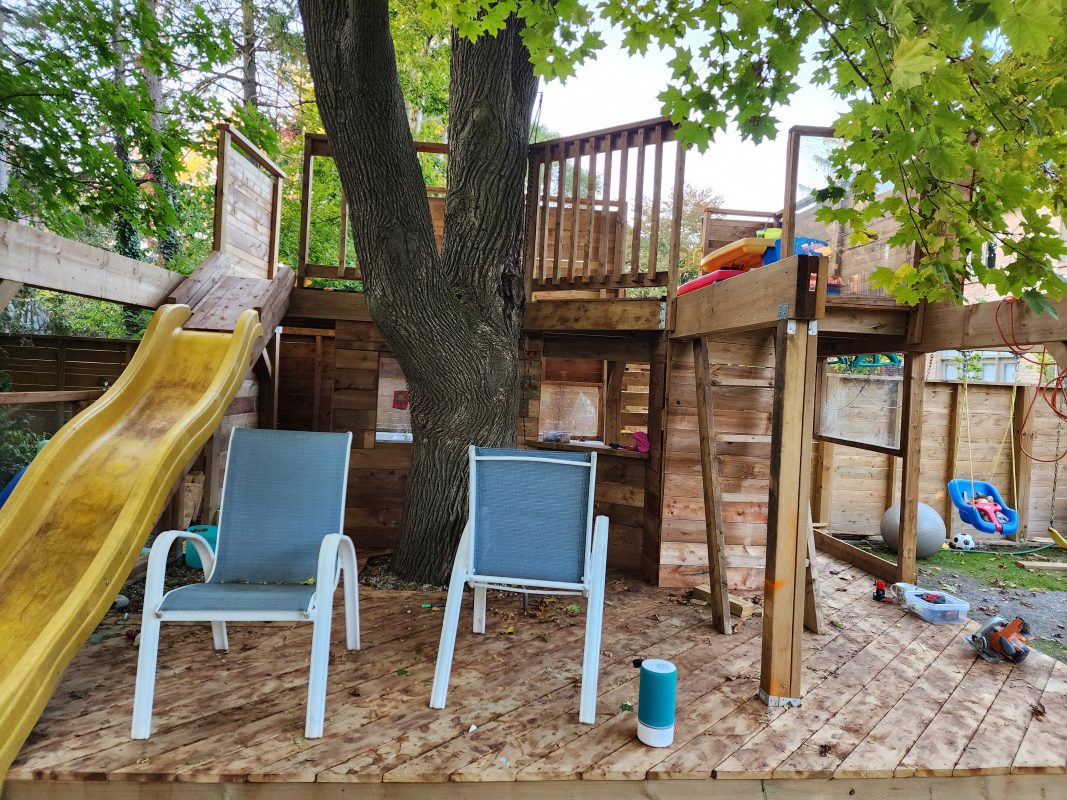

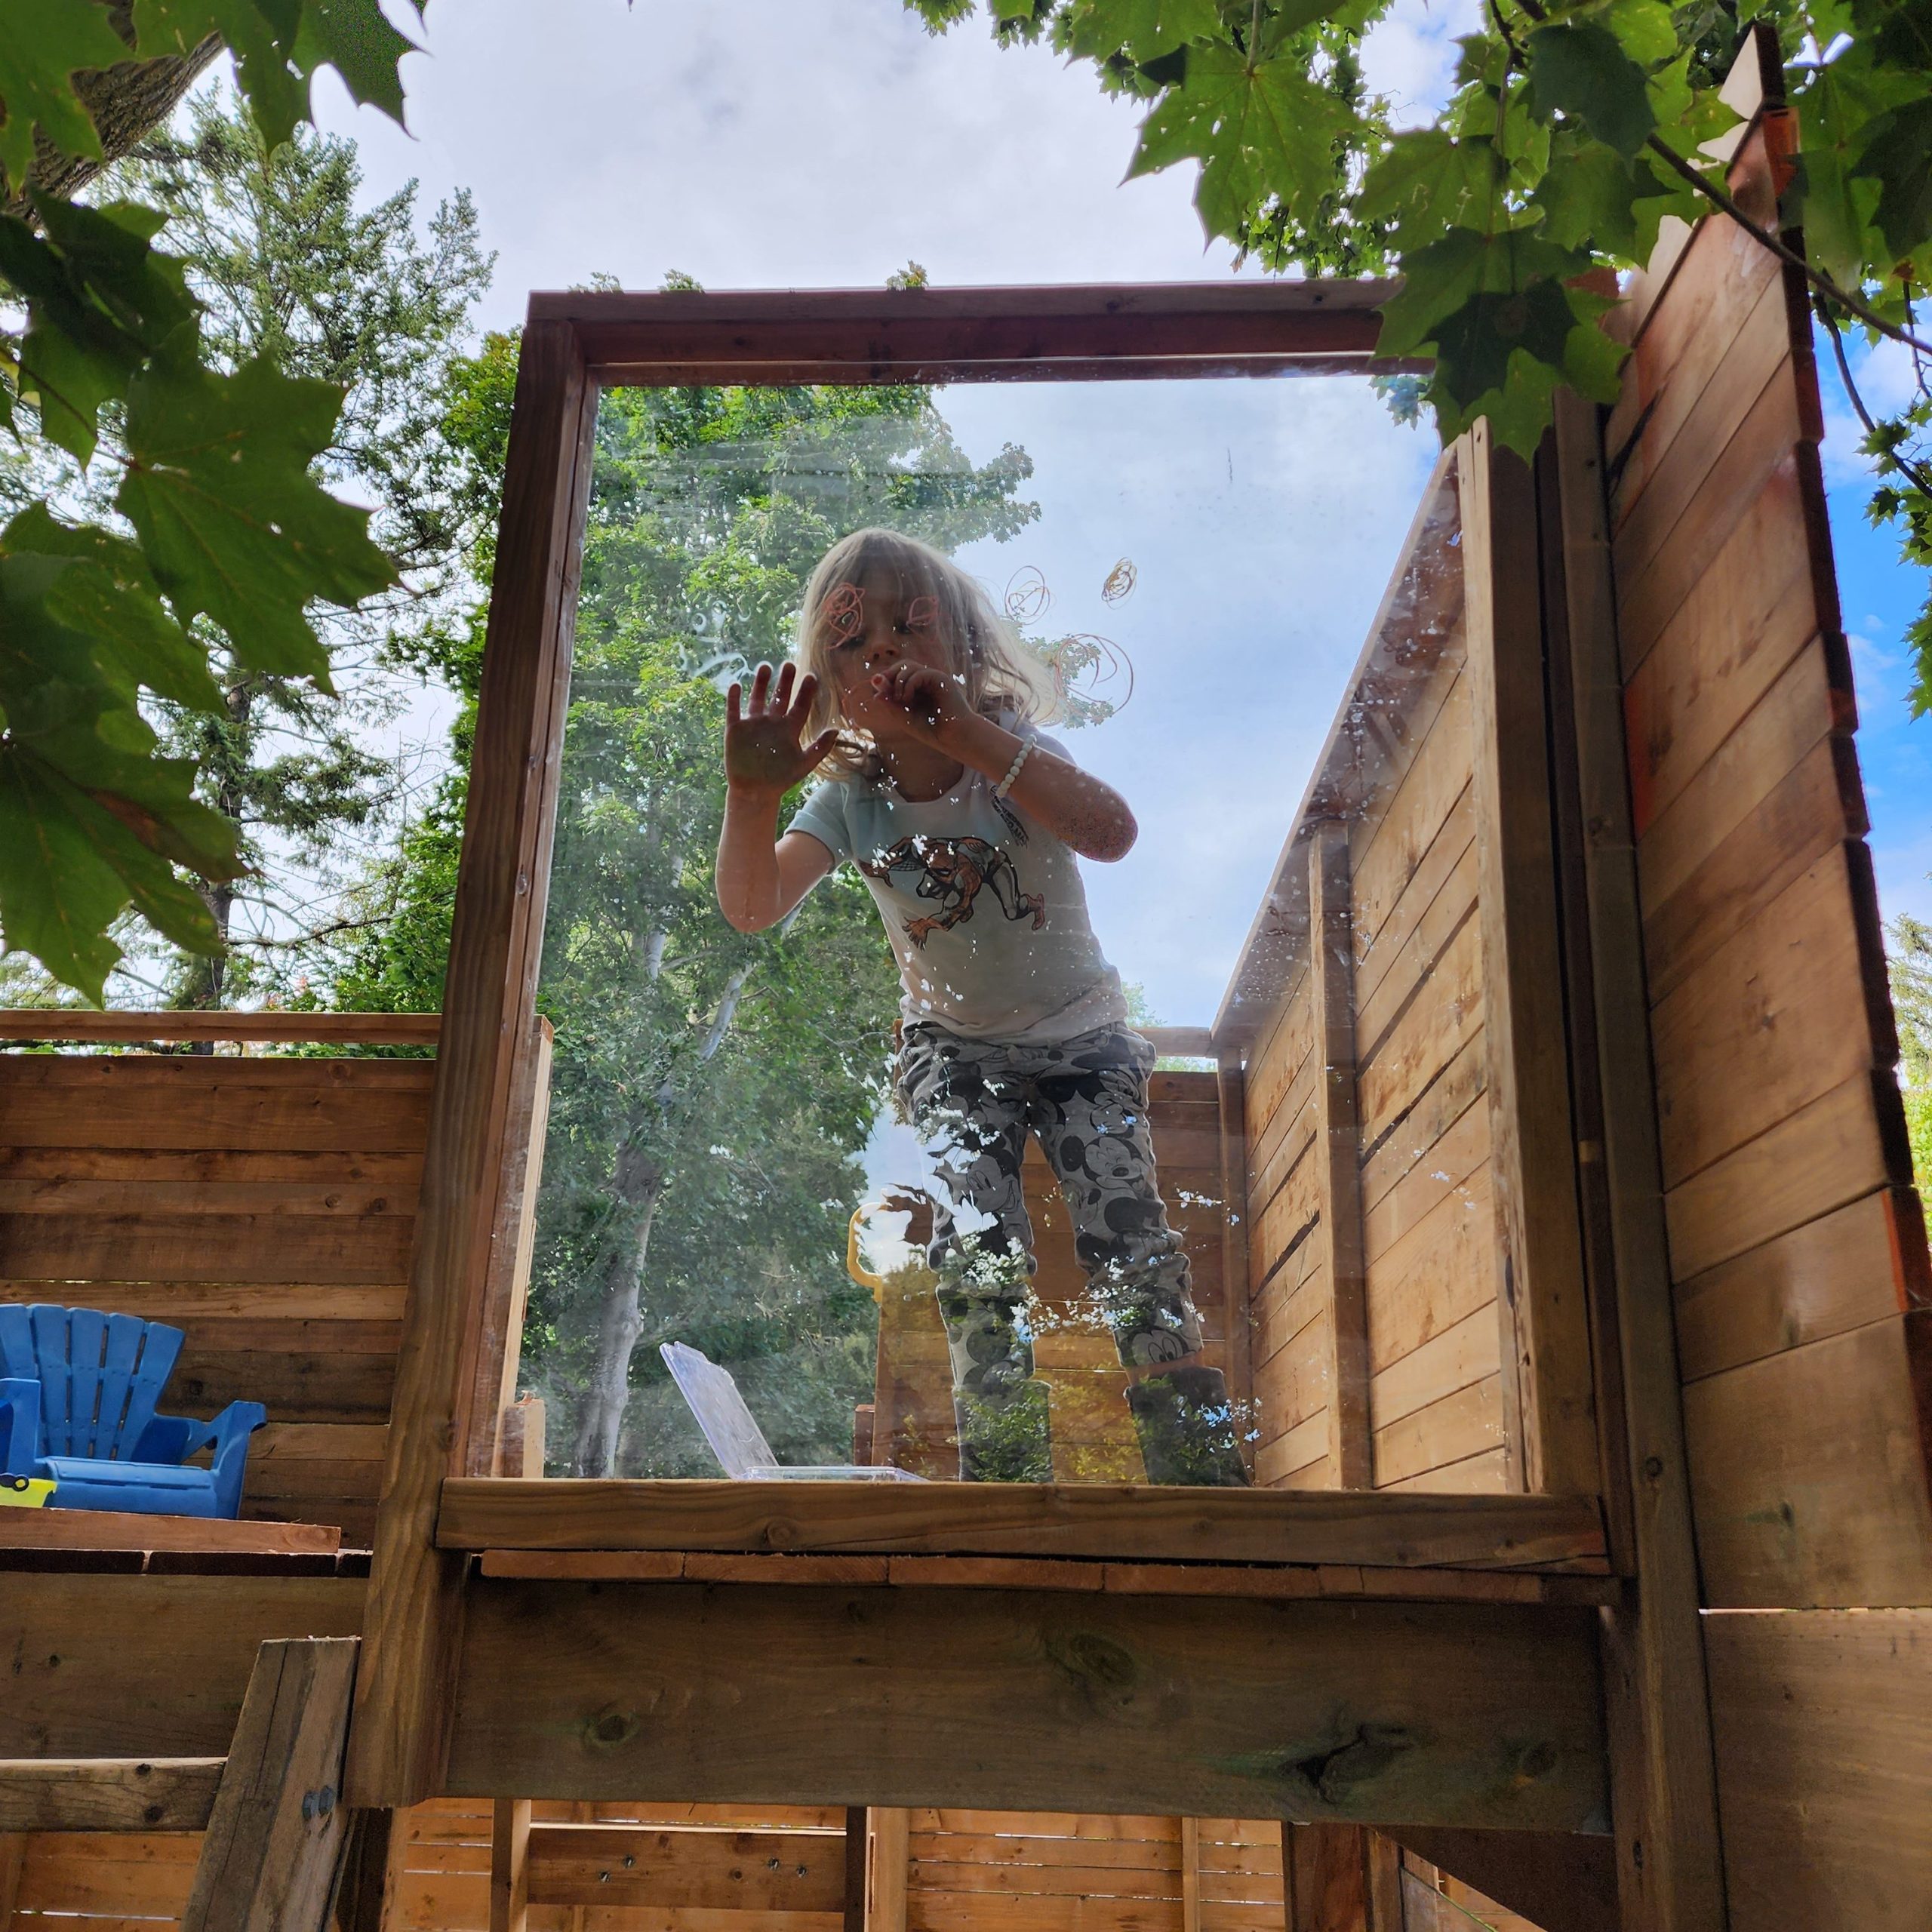
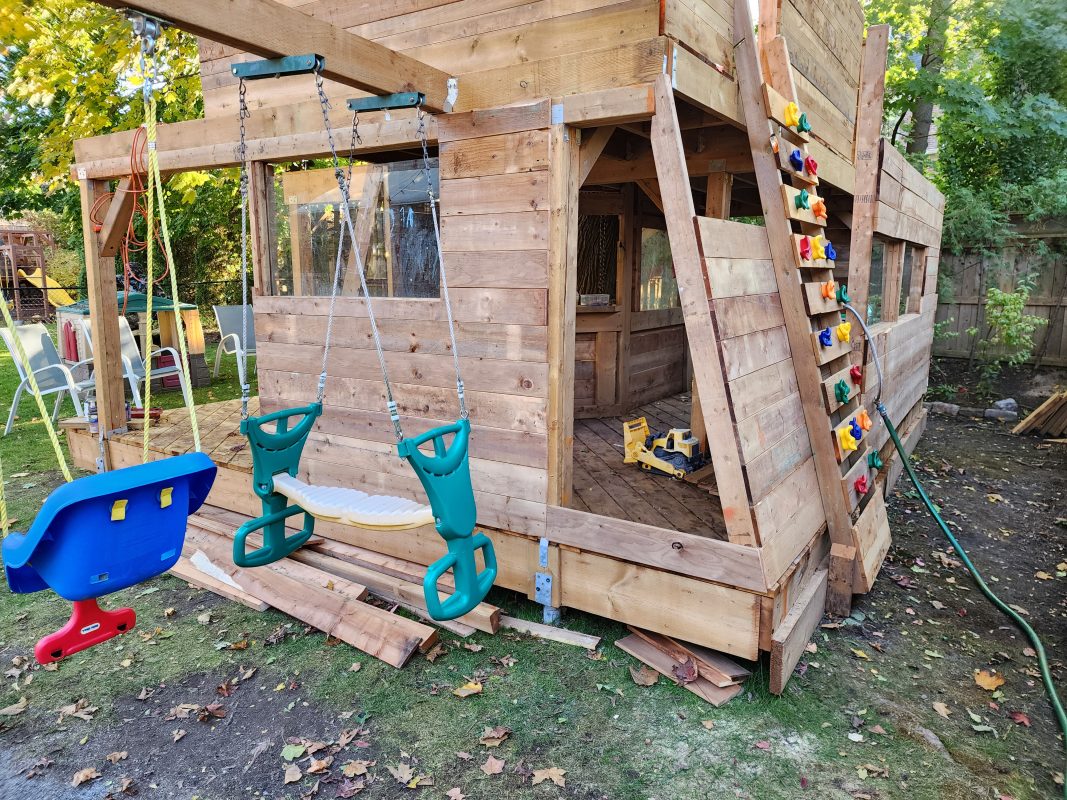
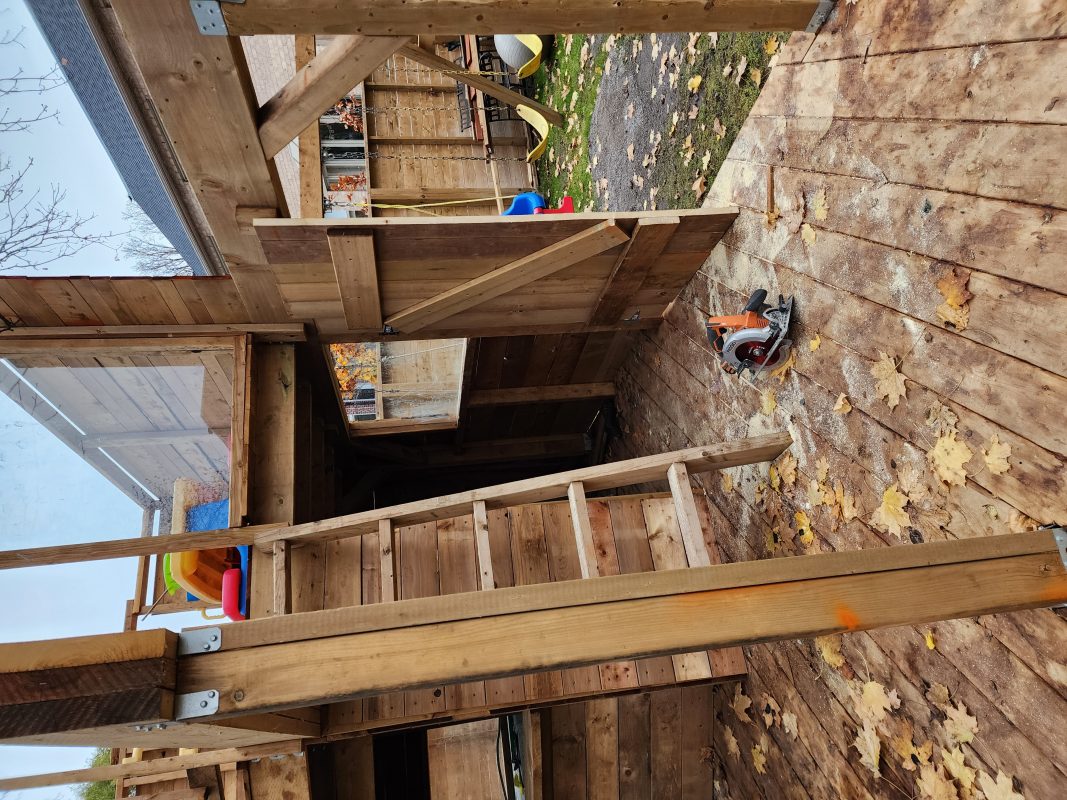
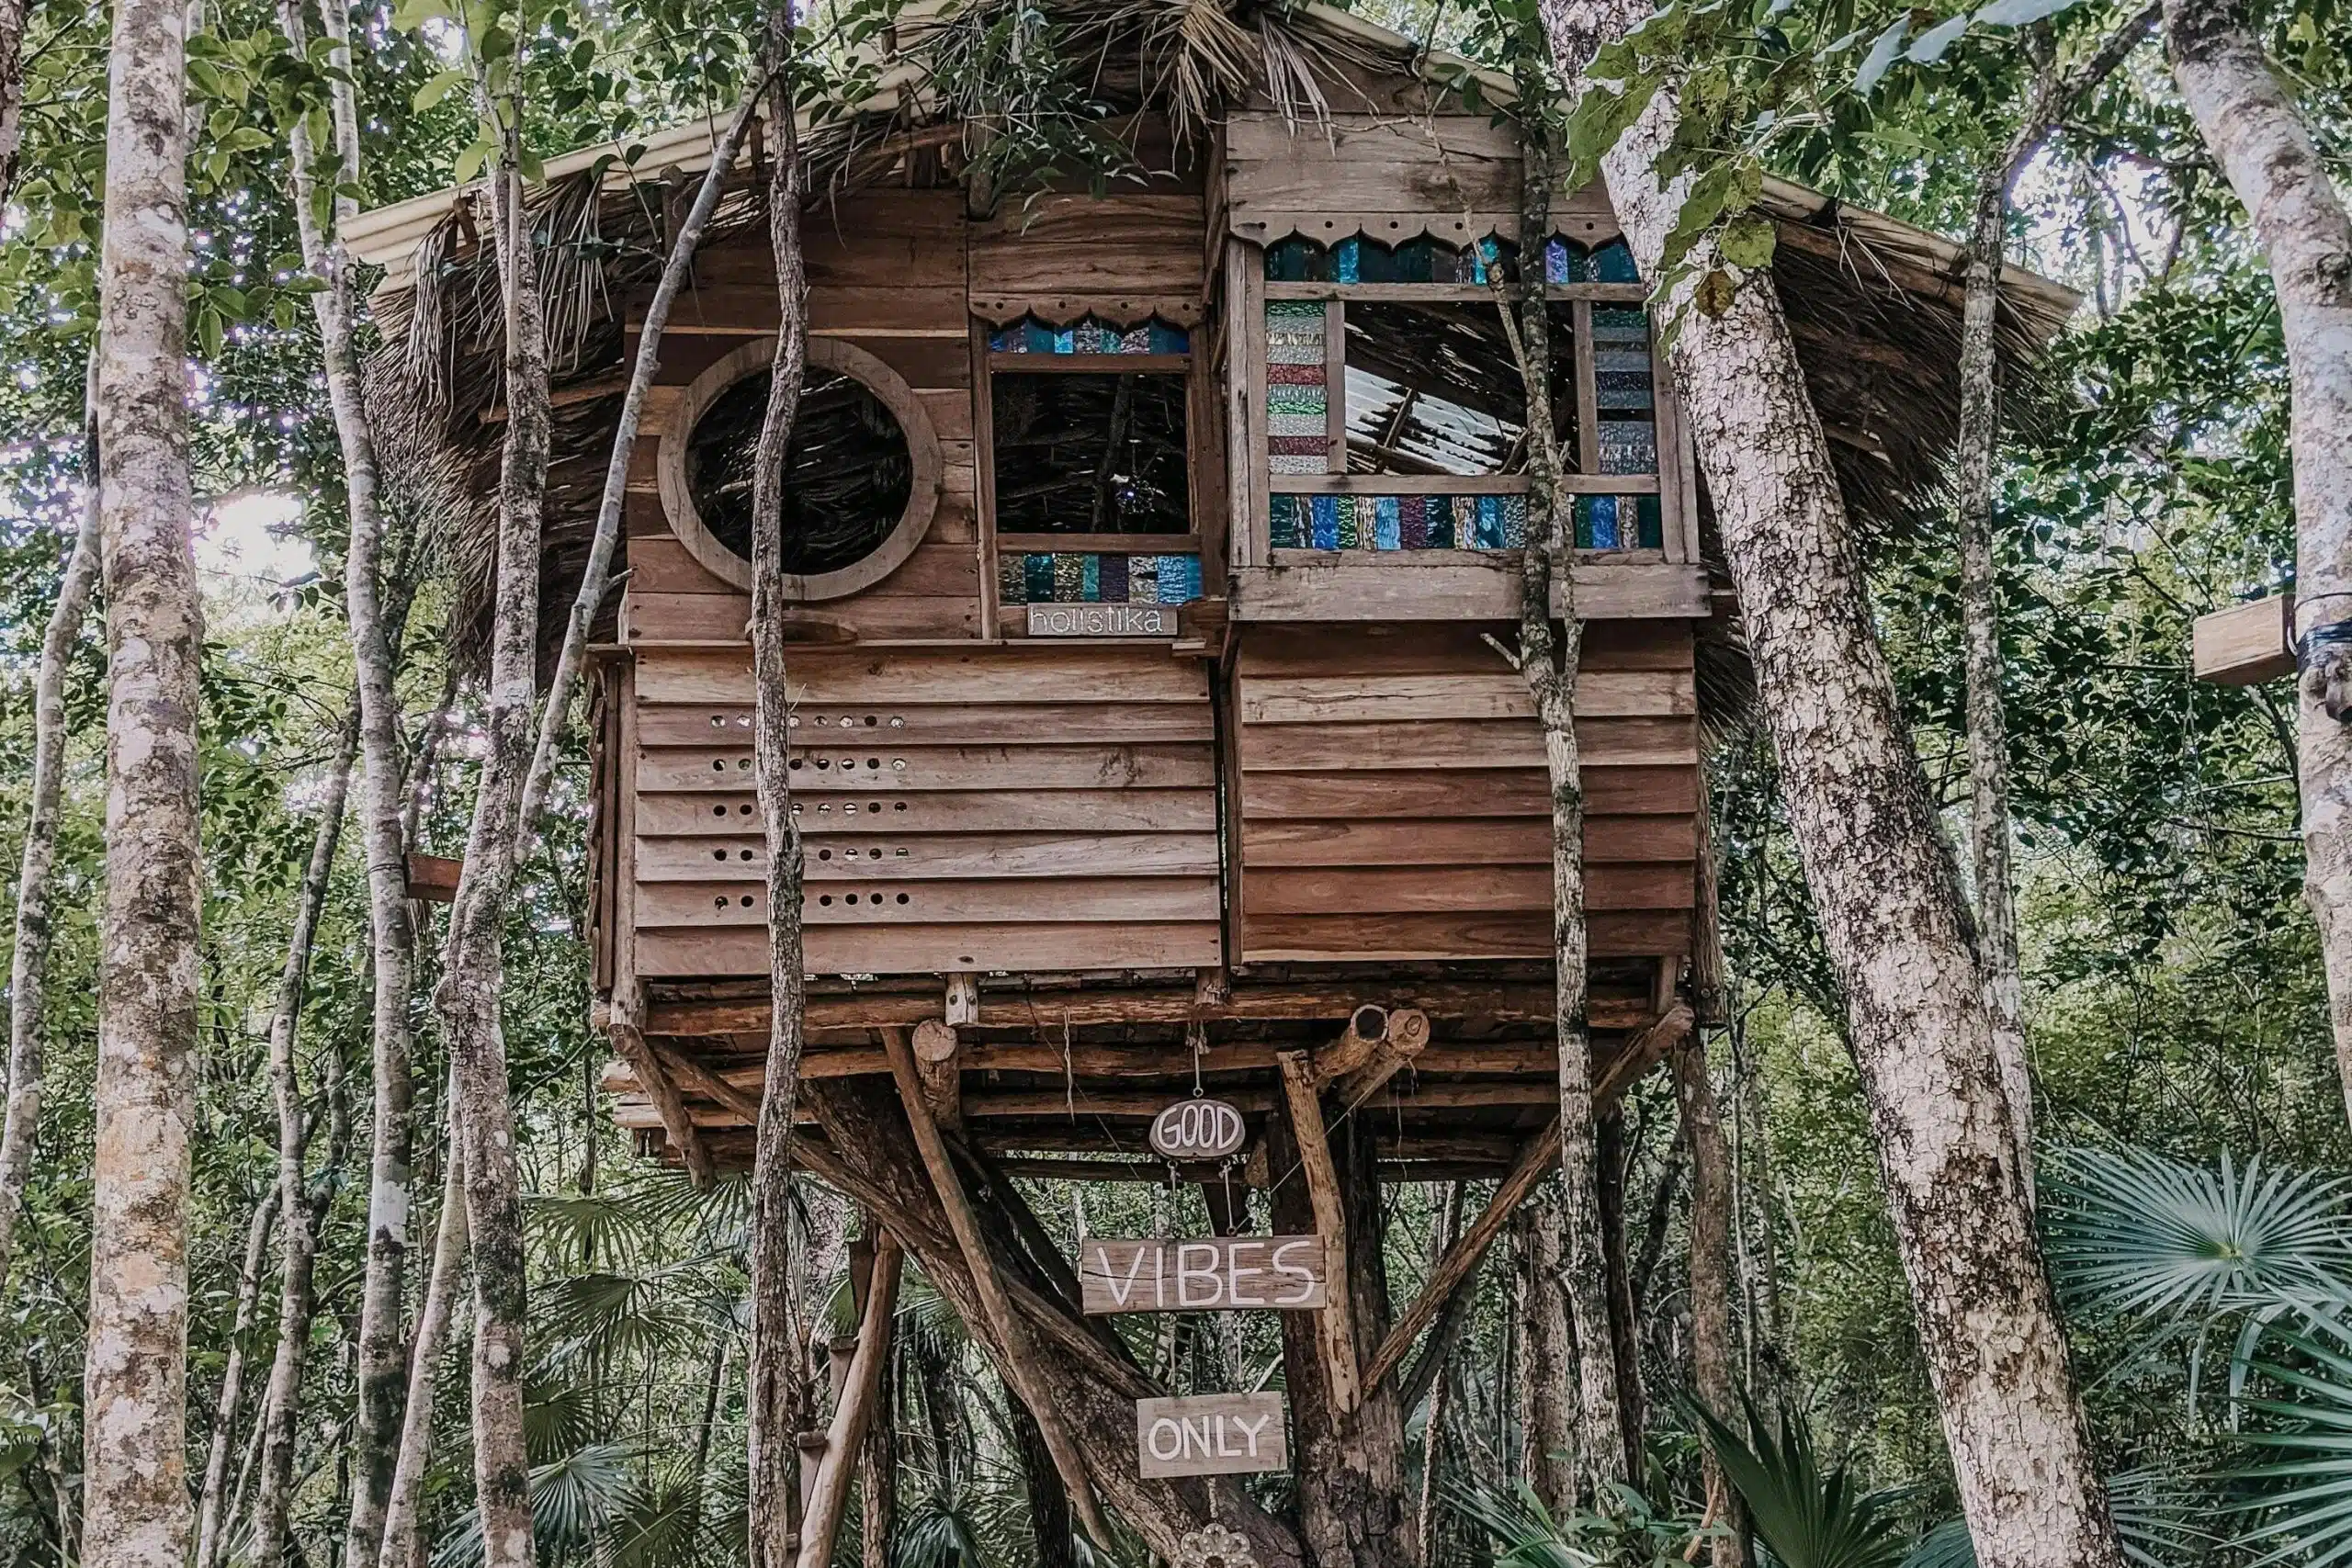
I over-engineered every aspect of the treehouse to make sure it was structurally sound and safe for even a bunch of adults to hang out on it. The rock-climbing wall is my preferred way to get up top, and a harder version is planned for next year on the other end. The windows are single-pane tempered glass to bring light inside, and double as writing surfaces with window markers and our favorite write-on-anything crayon: Wonderstix. I originally was going to put a roof over the second floor, but once the footprint doubled in size I decided enclosing the main floor instead was less imposing, and it’s really great just being up in the tree canopy.
On either end of the enclosed structure are doors so that on rainy days or winter time the inside can be a place of refuge, and it also keeps the leaves and dirt out. In the middle, is a ‘take-out window’ because, well, what good is a rock kitchen if you can’t take orders from your customers? Those customers of course are the adults hanging out in the open-air adult zone of the deck with their choice of BEvERages.
Cost Savings and Pride
I saved a ton of money by finding several key items like the slide, windows and countertops online through Kijiji and Facebook Marketplace. The biggest savings of all though is thanks to my local Home Depot. They gather up all of the warped/discoloured/damaged/unwanted pieces of wood that people toss to the back of the rack and sell it at a 75% discount called ‘Cull Lumber’ to make room for a new skid of wood. I ended up with a bunch of 4×4’s I didn’t really want, which I ended up cutting into 2x4s and managed to use every single piece of wood somewhere, chopping out small sections that were damaged or creatively using the really bad ones in spots that would never be seen. In general, most of the wood was perfectly fine, with just a split end or a curve in it at one spot.


The project started in late May after we had a pre-school graduation party that pretty much destroyed the last life left in the swingset, but thanks to the ground screw delays, other projects and only being able to commit about a day and a half a week to working on it (weather permitting) I finally declared the treehouse done in early November. Looking out the window every day at it gives me a great sense of pride and accomplishment, and I hope that one day I’ll get some sort of thank you. In the meantime I’m looking forward to years of fun and memories, and especially smiles.
What do you think I should exhaust myself building for them next year? Suggestions welcome in the comments below, or hit me up on Instagram @2lboxdiy to see more pictures of the build. Got your own great story to tell? Drop us a line using the contact form to submit your article!


Leave a Reply
You must be logged in to post a comment.